How to Automate Content Publishing with n8n + Gemini: The Complete Free Workflow Guide (2026)
A complete, step-by-step guide to building a free n8n + Gemini automation pipeline that pulls trending topics from HackerNews, GitHub Trending, and RSS feeds, writes full articles with Gemini 2.5 Flash, and auto-publishes them to dev.to — no code required.
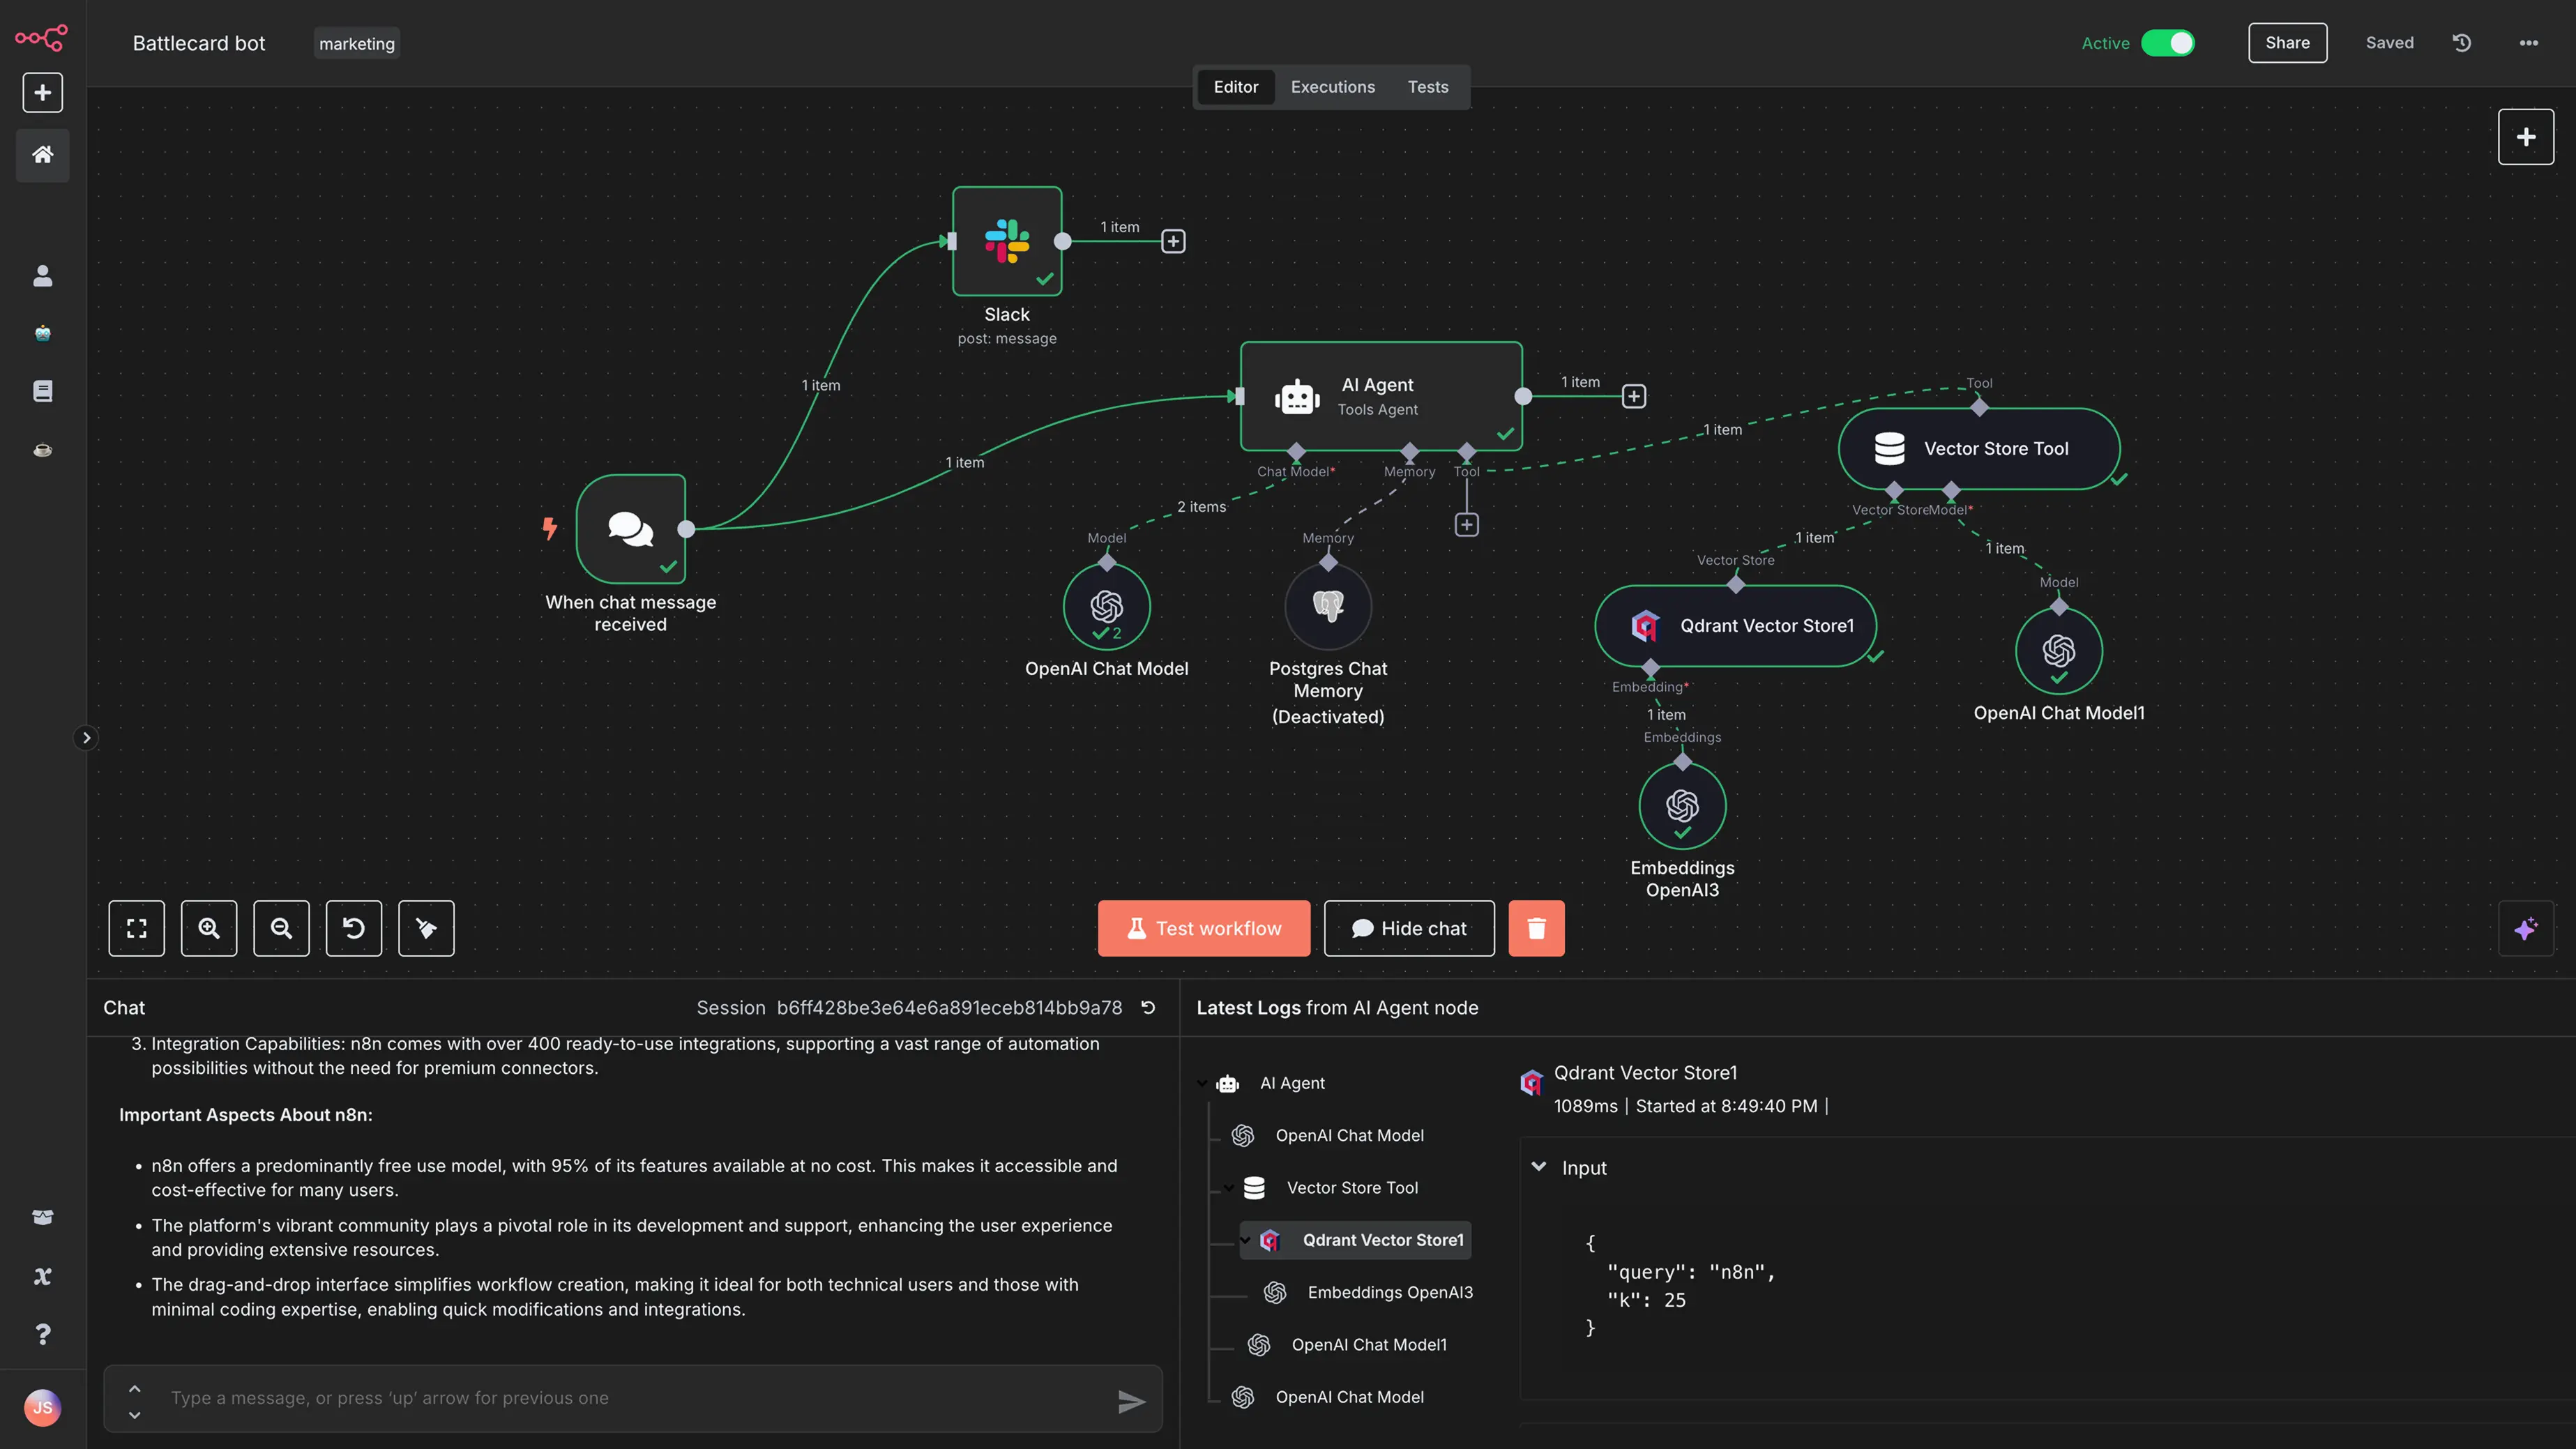
If you've ever tried to keep a technical blog or a dev.to profile consistently updated, you already know the real problem isn't writing one good article — it's writing the fiftieth one, three months later, when the initial motivation is gone and you're staring at a blank editor at 11 PM instead of sleeping.
I ran into this exact wall while building content for TheBitForge and my own dev.to profile. So I built something to fix it permanently: a fully automated content pipeline using n8n (a free, open-source workflow automation tool) and Google's Gemini API (specifically the Gemini 2.5 Flash model, because it's fast, cheap, and has a genuinely usable free tier). The pipeline pulls trending developer and AI news from HackerNews, GitHub Trending, and RSS feeds, rewrites it into an original, well-structured article using Gemini, and pushes the final result straight to dev.to as a published post — with zero manual copy-pasting.
This guide documents that entire system from the ground up: every account you need, every node you'll place in n8n, every API call, every JSON payload, and every mistake I made along the way so you don't have to repeat them. By the end, you'll have a working pipeline that can publish content on autopilot, whether that's once a day or once a week.
This is a long guide, because I'm not going to skip steps or hand-wave anything. Grab a coffee (or chai) and let's build this properly.
What We're Building and Why
Before touching any tool, let's define the system precisely, because vague automation plans are how people end up with broken workflows and no idea why.
The goal: A pipeline that runs on a schedule (say, once every 1–3 days), automatically does the following without any human input:
Fetches trending topics from three sources: HackerNews' top stories, GitHub's trending repositories, and a curated list of tech/AI RSS feeds.
Filters those topics so we don't republish something we've already covered, and so we only pick genuinely relevant, high-signal stories.
Sends the selected topic to Gemini 2.5 Flash with a carefully engineered prompt that asks it to write a full, structured, original article — not a summary, not a rewrite, an actual standalone piece with an introduction, sections, code examples where relevant, and a conclusion.
Parses Gemini's structured JSON response into a title, body, tags, and description.
Publishes the final article directly to dev.to using the dev.to API, either as a draft (for review) or live (fully automatic).
Why n8n and not Zapier or Make.com? Three reasons, and I want to be honest about the tradeoffs rather than just cheerleading for n8n:
n8n is open-source and fair-code licensed. Self-hosted, it has no per-task pricing — you pay for your server, not per execution. Zapier and Make.com charge per operation or per task, which adds up fast once you're running AI workflows with 8–10 nodes per run.
n8n has a native HTTP Request node that can call any API, including ones with no pre-built integration. This matters a lot here because dev.to doesn't have an official n8n node — you'll be using HTTP Request to talk to it directly.
n8n has first-class support for AI nodes, including a Google Gemini Chat Model node that plugs directly into its LangChain-based AI Agent and Basic LLM Chain nodes, so you don't have to hand-roll every Gemini API call as raw JSON (though I'll show you the raw HTTP method too, since it gives you more control over structured JSON output).
Why Gemini and not GPT-4 or Claude? Purely a cost and quota argument. As of mid-2026, <cite index="35-2">Gemini 2.5 Flash offers 10 requests per minute and 250 requests per day on the free tier, with a shared 250,000 tokens-per-minute limit and full access to the 1-million-token context window</cite>. For a blog automation pipeline publishing a handful of articles per week, that free quota is more than enough to never pay a cent — something that isn't realistically true of GPT-4-class models at this volume.
The Complete Architecture
Here's the full pipeline, node by node, exactly as it runs in n8n:
[Schedule Trigger]
        │
        ▼
[HTTP Request: HackerNews Top Stories]
[HTTP Request: GitHub Trending]         ──┐
[RSS Feed Read: Tech/AI feeds]             │
        │                                  │
        ▼                                 │
   [Merge Node] ◄───────────────────────────┘
        │
        ▼
[Code Node: Score & Filter Topics]
        │
        ▼
[IF Node: Already Published? (dedupe check)]
        │ (false branch continues)
        ▼
[Google Gemini Chat Model / HTTP Request: Generate Article]
        │
        ▼
[Code Node: Parse Gemini JSON Response]
        │
        ▼
[IF Node: Validate Output Quality]
        │ (passed)
        ▼
[HTTP Request: POST to dev.to API]
        │
        ▼
[Set Node: Log Published Article]
        │
        ▼
[Error Trigger Branch → Telegram/Email Alert on Failure]
Each of these blocks is a real, separately configured node inside your n8n canvas. We'll build every single one.
Prerequisites and Accounts You'll Need
Before starting, make sure you have:
An n8n instance — either n8n Cloud (paid, hosted) or a self-hosted instance (free, requires a VPS or local machine). I'll cover both paths.
A Google account for Gemini API access via Google AI Studio.
A dev.to account with API access enabled.
(Optional but recommended) A Telegram bot or email account for error alerts.
Basic comfort with JSON — you don't need to code, but you'll be reading and lightly editing JSON payloads throughout this guide.
Step 1: Setting Up n8n
Option A — n8n Cloud (fastest, has a free trial)
Go to n8n.io and sign up. <cite index="21-2">Self-hosted n8n is free with unlimited workflow executions under the fair-code license, while n8n Cloud offers a free tier with limited executions for personal use and paid plans that scale with usage</cite>.
Create a new workflow from your dashboard.
Option B — Self-Hosted n8n (free, more setup)
If you want zero ongoing cost, self-hosting is the way to go. The most common approach is Docker:
docker run -it --rm \
  --name n8n \
  -p 5678:5678 \
  -v n8n_data:/home/node/.n8n \
  docker.n8n.io/n8nio/n8n
This spins up n8n on http://localhost:5678. For a production setup that survives reboots and stays online 24/7 (which you need, since this pipeline runs on a schedule), deploy it to a small VPS (a $5–7/month droplet or similar is enough) using Docker Compose with a persistent volume, and put it behind a reverse proxy like Caddy or Nginx with HTTPS enabled via Let's Encrypt.
Note on enterprise features: <cite index="21-2">Enterprise features like SSO and audit logging require a paid enterprise license, but everything this guide uses — schedule triggers, HTTP requests, code nodes, AI nodes — is fully available on the free self-hosted license with unlimited executions</cite>.
Once n8n is running, log in, and click "Add Workflow" to create a blank canvas. Name it something like Content Automation — HN + GitHub + Gemini → dev.to.
\Step 2: Getting Your Gemini API Key
Go to Google AI Studio (aistudio.google.com).
Sign in with your Google account.
Click "Get API Key" → "Create API Key".
Choose a Google Cloud project (or let it create a new one automatically).
Copy the generated key immediately — you'll paste it into n8n as a credential.
Which model should you actually use? Use gemini-2.5-flash. Here's why, based on the actual current numbers: <cite index="34-1,34-3">Gemini 2.5 Flash costs $0.30 per 1 million input tokens and $2.50 per 1 million output tokens on the paid tier, and Google AI Studio offers free access to Flash and Flash-Lite models with reduced daily quotas as of April 2026</cite>. Compare that to Gemini 2.5 Pro, where <cite index="34-1">Pro is priced between $1.25 and $2.50 per million input tokens and $10–$15 per million output tokens, and was moved fully behind a paywall on the free tier as of April 1, 2026</cite>. For writing blog articles — which don't require frontier-level multi-step reasoning — Flash is the correct choice on both cost and availability grounds.
A word of caution on model longevity: <cite index="39-1">Gemini 2.5 Flash is scheduled for discontinuation on Vertex AI on October 16, 2026</cite>, so if you're building this pipeline to last, keep an eye on Google's model deprecation page and be ready to swap the model string when the time comes — n8n makes this a one-line change, not a rebuild.
Free Tier Reality Check
Don't take random numbers from old blog posts — here's what's actually true as of the most recent published data: <cite index="35-2">the free tier gives Gemini 2.5 Flash 10 requests per minute and 250 requests per day, and Gemini 2.5 Flash-Lite 15 requests per minute and 1,000 requests per day, both sharing a 250,000 tokens-per-minute limit and the full 1-million-token context window</cite>. For a content pipeline publishing even 3–5 articles a day, this is nowhere close to the ceiling. Also important: <cite index="35-2">no credit card is required to get started on the free tier, but prompts and responses on the free tier may be used to improve Google's products</cite> — worth knowing if you're ever generating content involving anything sensitive.
Save this API key somewhere safe. In n8n, go to Credentials → New → Google Gemini (PaLM) API, paste the key, and save it as Gemini API - Content Bot.
Step 3: Getting Your dev.to API Key
<cite index="24-1">To create a new article via the dev.to API, you make a POST request to the articles endpoint</cite>, but first you need an API key.
<cite index="24-1">Go to your dev.to account settings, click "Extensions" in the left panel, and scroll to the "DEV Community API Keys" section</cite>.
Enter a description like
n8n-automationand click Generate API Key.Copy the key — dev.to will only show it once.
Important authentication detail: dev.to's API has two versions. <cite index="28-1">Version 1 is the recommended way to interact with the platform, and it requires clients to send an accept header set to application/vnd.forem.api-v1+json, along with an api-key header set to the API key for the user</cite>. If you skip the accept header, you'll silently fall back to the deprecated v0 behavior, which can cause confusing inconsistencies. Also note: <cite index="29-1">all requests to the Forem API (which powers dev.to) must send a user-agent header</cite>, or you risk a 403 error on some endpoints.
In n8n, go to Credentials → New → Header Auth, and set:
Name:
api-keyValue: your dev.to API key
Save this as DevTo API - Content Bot.
Step 4: Building the Schedule Trigger
Back in your workflow canvas:
Add a Schedule Trigger node (search "Schedule" in the node panel).
Set Trigger Interval to whatever cadence you want. For a sustainable pace without burning through ideas too fast, I recommend every 2 days at a fixed time, e.g., 9:00 AM. <cite index="12-1">This node is the heartbeat of the workflow — every time it fires, it passes execution to the next node, and without it, nothing runs</cite>.
You now have a live trigger. Everything downstream fires from this node.
Step 5: Sourcing Trending Topics
This is where the pipeline gets its raw material. We're pulling from three independent sources to maximize topic diversity and reduce the chance of running dry.
5.1 — HackerNews Top Stories
HackerNews has a free, no-auth-required public API. Add an HTTP Request node:
Method: GET
URL:
https://hacker-news.firebaseio.com/v0/topstories.json
This returns an array of story IDs (not full stories). You then need a second HTTP Request node inside a Loop Over Items (Split in Batches) node to fetch each story's details:
Method: GET
URL:
https://hacker-news.firebaseio.com/v0/item/{{ $json.id }}.json
This returns a JSON object with title, url, score, and descendants (comment count) — score and comment count are your signal for how "trending" a story actually is.
5.2 — GitHub Trending
GitHub doesn't have an official "trending" API endpoint, so the common workaround is either scraping the public trending page (fragile, breaks often) or using the GitHub Search API, which is stable and authenticated. Add another HTTP Request node:
Method: GET
URL:
https://api.github.com/search/repositoriesQuery Parameters:
q:created:>2026-07-07 stars:>50(adjust the date to ~7 days before your run)sort:starsorder:desc
This gives you genuinely trending new repositories without depending on an unofficial scraper.
5.3 — RSS Feeds
Add an RSS Feed Read node (built into n8n) for each feed you want to track. Good dev/AI sources to add:
A major tech news RSS feed of your choice
An official Google AI / Gemini blog RSS feed
A general AI research digest feed
Each RSS Feed Read node outputs title, link, pubDate, and contentSnippet — exactly what you need for topic sourcing.
5.4 — Merging the Sources
Add a Merge node set to "Append" mode, and connect all three source branches into it. This combines HackerNews stories, GitHub repos, and RSS items into a single unified list of candidate topics that flows into the next stage.
Step 6: Filtering and Deduplicating Topics
Raw trending data is noisy — not everything is worth writing about, and you don't want to publish the same topic twice. This is where a Code node (JavaScript) earns its place.
Add a Code node right after the Merge node, in "Run Once for All Items" mode, with logic like this:
// Score each item and pick the strongest candidate
const items = $input.all();

const scored = items.map(item => {
  const data = item.json;
  let score = 0;

  // HackerNews scoring
  if (data.score) score += data.score;
  if (data.descendants) score += data.descendants * 2;

  // GitHub scoring
  if (data.stargazers_count) score += data.stargazers_count * 0.5;

  // Keyword relevance boost — adjust to your niche
  const relevantKeywords = ['ai', 'javascript', 'typescript', 'nextjs', 'react', 'automation', 'llm', 'api'];
  const title = (data.title || data.name || '').toLowerCase();
  relevantKeywords.forEach(kw => {
    if (title.includes(kw)) score += 15;
  });

  return { ...data, computedScore: score };
});

scored.sort((a, b) => b.computedScore - a.computedScore);

return [{ json: scored[0] }]; // top candidate only
This gives you a single, ranked top candidate per run. For deduplication, add an IF node right after that checks your published-articles log (see Step 13) against the selected title/URL, and routes duplicates to a dead-end "skip" branch instead of continuing to Gemini.
Step 7: Generating the Article with Gemini
Now for the core of the pipeline. You have two implementation paths in n8n:
Path A — Native Gemini node (easier): Add a Basic LLM Chain node, and under its model sub-node, select Google Gemini Chat Model, choosing gemini-2.5-flash. <cite index="5-1">This pattern — Schedule Trigger → data source → Google Gemini Chat Model via Basic LLM Chain → output — monitors incoming content and generates drafts automatically without custom code</cite>.
Path B — Raw HTTP Request (more control, recommended for structured JSON output): Add an HTTP Request node configured as:
Method: POST
URL:
https://generativelanguage.googleapis.com/v1beta/models/gemini-2.5-flash:generateContentAuthentication: Header Auth, header name
x-goog-api-key, value = your Gemini credentialBody (JSON):
{
  "contents": [
    {
      "parts": [
        { "text": "{{ $json.finalPrompt }}" }
      ]
    }
  ],
  "generationConfig": {
    "temperature": 0.7,
    "maxOutputTokens": 8192,
    "responseMimeType": "application/json"
  }
}
I recommend Path B for this pipeline specifically, because setting responseMimeType to application/json forces Gemini to return clean, parseable JSON instead of free-form markdown wrapped in commentary — which makes the next step (parsing) dramatically more reliable.
Step 8: Structuring the Gemini Prompt Correctly
The prompt is the single most important part of this entire system. A weak prompt gives you generic, thin, AI-sounding content. A well-structured one gives you something genuinely publishable.
Add a Set node (or a Code node) before the Gemini HTTP Request to build the finalPrompt field:
const topic = $json.title;
const sourceUrl = $json.url || $json.link;
const sourceContext = $json.contentSnippet || $json.description || '';

const prompt = `You are an experienced technical writer and senior software developer writing for a developer-focused blog. Write a complete, original, long-form article inspired by this trending topic — do not copy or closely paraphrase any source text, write entirely in your own words based on the general subject matter.

TOPIC: ${topic}
CONTEXT: ${sourceContext}

Requirements:
- Write 1500-2200 words.
- Structure: an engaging introduction, 5-7 clearly headed sections (##), practical code examples where relevant, and a conclusion with actionable takeaways.
- Tone: practical, developer-to-developer, no fluff, no generic AI phrasing like "in today's fast-paced world."
- Include at least one original code snippet if the topic is technical.
- Do not fabricate specific statistics, version numbers, or quotes you cannot verify — speak generally and accurately instead.

Respond ONLY with valid JSON in this exact schema, no markdown fences, no extra text:
{
  "title": "SEO-friendly article title, under 70 characters",
  "description": "1-2 sentence meta description, under 160 characters",
  "body_markdown": "the full article in markdown format",
  "tags": ["tag1", "tag2", "tag3", "tag4"],
  "canonical_source": "${sourceUrl}"
}`;

return [{ json: { ...$json, finalPrompt: prompt } }];
A few deliberate design choices here worth explaining:
"Do not fabricate specific statistics" — this single line meaningfully reduces hallucinated facts, which is the #1 risk of automated content generation. Always keep this instruction in any content-generation prompt.
Tag limit of 4 — matches dev.to's own constraint, which only accepts up to 4 tags per article.
responseMimeType: application/json+ explicit schema — together these make Gemini return structured, directly parseable output instead of conversational text you'd have to regex out.
Step 9: Parsing Gemini's Response
Gemini's HTTP response wraps your JSON payload inside its own response structure. Add a Code node after the Gemini HTTP Request:
const response = $input.first().json;

// Gemini's response structure: candidates[0].content.parts[0].text
const rawText = response.candidates[0].content.parts[0].text;

let article;
try {
  article = JSON.parse(rawText);
} catch (e) {
  throw new Error('Gemini did not return valid JSON: ' + rawText.slice(0, 300));
}

// Basic quality gates
if (!article.title || !article.body_markdown || article.body_markdown.length < 800) {
  throw new Error('Generated article failed quality check — too short or missing fields.');
}

return [{ json: article }];
This node does two jobs at once: extracting the real payload from Gemini's response envelope, and acting as a quality gate that throws an error (which your error-handling branch will catch) rather than silently publishing something broken.
Step 10: Auto-Publishing to dev.to
Now the final step — pushing the finished article live. Add an HTTP Request node:
Method: POST
URL:
https://dev.to/api/articlesAuthentication: your
DevTo API - Content Botheader auth credentialHeaders:
Content-Type: application/jsonAccept: application/vnd.forem.api-v1+json
Body (JSON):
{
  "article": {
    "title": "{{ $json.title }}",
    "body_markdown": "{{ $json.body_markdown }}",
    "published": false,
    "tags": {{ JSON.stringify($json.tags) }},
    "description": "{{ $json.description }}",
    "canonical_url": "{{ $json.canonical_source }}"
  }
}
Critically, notice "published": false. <cite index="24-1">Test your requests with published: false to avoid accidental public posts</cite> — this is dev.to's own official recommendation, and I'd strongly suggest keeping it false for at least your first 1–2 weeks of running this pipeline, reviewing drafts manually, and only flipping it to true once you trust the output consistency.
Rate limit awareness: <cite index="24-1">there is a limit of 10 requests per 30 seconds on creating an article, and exceeding this returns a 429 status code</cite>. At the cadence this guide recommends (one article every 1–2 days), you will never come close to this limit — but it matters if you ever try to batch-publish many drafts at once.
Step 11: Error Handling and Retries
Production automations fail — an API times out, a quota resets, a JSON parse breaks. <cite index="21-6">Neglecting error handling is one of the biggest mistakes teams make when moving from development to production, and every node in n8n has an error output that can be connected to a separate error-handling branch to send alerts, log errors, retry operations, or queue items for manual review</cite>.
Practical setup for this pipeline:
Add an Error Trigger node as a separate, disconnected node in your workflow — n8n automatically calls it whenever any node in the main workflow throws an unhandled error.
Connect it to a Telegram node (or Send Email node) that messages you:
"Content pipeline failed: {{ $json.error.message }}".On your critical nodes (the Gemini HTTP Request and the dev.to publish request), enable "Retry On Fail" in the node's settings panel, with 2–3 retries and a delay of a few seconds — this alone <cite index="21-6">handles transient errors like API rate limits or temporary network issues automatically</cite>.
Step 12: Testing the Full Pipeline Safely
Never activate a content-publishing automation without testing it manually first. Here's the safe sequence:
Keep
"published": falsein the dev.to publish node.Click "Execute Workflow" manually from the Schedule Trigger node in the n8n editor.
Watch each node execute — green checkmarks confirm success, red means a failure you need to inspect.
Open your dev.to dashboard → Drafts and read the generated article fully. Check for: factual accuracy, natural tone, correct tags, working code examples, and a title that isn't cut off or malformed.
Run it 3–5 times across different trending topics before trusting it. AI output quality can vary significantly depending on how much genuine context the source topic gave Gemini to work with.
Step 13: Going Live and Monitoring
Once you're confident in the output quality:
Flip
"published"totruein the dev.to publish node (or keep it as a variable you control from a Set node earlier, so you can toggle it without hunting through the workflow).Add a lightweight logging step — a Google Sheets or Airtable node right after the successful publish, writing the title, URL, and timestamp. This becomes your deduplication source of truth for Step 6, and also gives you a simple dashboard of everything the bot has ever published.
Click the Activate toggle in the top-right of the n8n editor to switch the workflow from manual to production mode.
Check the Executions tab daily for the first week or two — <cite index="20-3">the entire system runs through a single pipeline, but checking execution logs early is how you catch a broken API key or dead RSS feed before it silently fails for a month</cite>.
Rate Limits, Costs, and Free Tier Math
Let's be concrete about what this actually costs you, because "free" claims without numbers aren't useful.
Gemini side: <cite index="35-2">the free tier gives Gemini 2.5 Flash 250 requests per day</cite>. This pipeline uses roughly 1 Gemini call per article. Publishing daily uses 1/250th of your daily quota — you could run this pipeline 250 times a day before hitting a limit, which you obviously won't. Cost: $0.00, indefinitely, as long as you stay on Flash or Flash-Lite.
If you ever exceed free tier (unlikely at this scale, but worth knowing): <cite index="34-1">Gemini 2.5 Flash costs $0.30 per million input tokens and $2.50 per million output tokens</cite>. A ~2,000-word article is roughly 2,600 output tokens plus maybe 500 prompt tokens — so a single article costs a fraction of a cent even on the paid tier.
dev.to side: completely free, no API costs, only <cite index="24-1">the 10-requests-per-30-seconds rate limit on article creation</cite>, which a daily/every-other-day publishing cadence never approaches.
n8n side: free if self-hosted (just your VPS cost, roughly $5–7/month), or free-tier-limited if using n8n Cloud.
Total realistic monthly cost of this entire pipeline: $0–$7, depending only on whether you self-host n8n or pay for a small VPS.
Common Errors and How to Fix Them
Based on real issues developers hit building similar pipelines:
"429 Too Many Requests" from Gemini — <cite index="32-3">if you hit a rate limit, the API returns a 429 RESOURCE_EXHAUSTED error; wait and retry after a short period, or reduce the rate of expensive requests, for example by using smaller context windows or shorter outputs</cite>. In practice, this means: check you're not accidentally looping the Gemini node inside a batch of many items at once.
"401 Unauthorized" from dev.to — <cite index="12-1">this usually means the application/API key is wrong, or you used your regular login credential instead of the generated API key</cite>. Double-check you copied the key from Settings → Extensions, not your account password.
"403 Forbidden" from dev.to/Forem endpoints — <cite index="29-1">all requests must send a user-agent header, or certain endpoints will reject the request</cite>. Add a User-Agent header manually in your HTTP Request node if you hit this.
Gemini returns text wrapped in markdown code fences instead of raw JSON — this happens if you forget to set responseMimeType: "application/json" in the generationConfig. Double-check that field is present in your request body exactly as shown in Step 7.
Duplicate articles published — your dedup Code node (Step 6) is either missing or not correctly checking against your published-articles log (Step 13). Make sure the logging step runs before the next scheduled trigger fires.
Ethical and Quality Considerations
A few honest notes, because automated publishing carries real responsibility:
Never present AI-written content as 100% human-authored if your platform or audience expects otherwise. Many blogs (including dev.to's own community guidelines context) appreciate transparency. Consider adding a short note like "Drafted with AI assistance, reviewed by [you]" if you're publishing at meaningful scale.
Always spot-check for factual accuracy, especially around version numbers, pricing, and specific claims — LLMs can still hallucinate confidently, and the "do not fabricate statistics" prompt instruction helps but isn't a guarantee.
Canonical URLs matter. If your article is meaningfully inspired by one dominant source, set the
canonical_urlfield honestly rather than omitting it, which is both an SEO best practice and a fairness-to-original-authors practice.Don't spam. A pipeline that can publish 20 times a day doesn't mean it should. Quality and consistency beat volume for both SEO and reader trust.
Extending the Pipeline Further
Once the core pipeline is stable, natural next steps include:
Featured image generation — add a Gemini or image-generation API call to produce a cover image per article before publishing, then upload it via dev.to's
main_imagefield.Cross-posting — after a successful dev.to publish, branch the workflow into a second HTTP Request that also posts to your own Next.js blog via its API, or to Hashnode, using the same generated
body_markdown.Social promotion — add a follow-up branch that posts a shortened summary + link to X/LinkedIn/Reddit once the article goes live, similar in spirit to <cite index="14-1">workflows that automatically send generated content and a screenshot to platforms like X, LinkedIn, and Threads, with a text-only version sent to Reddit</cite>.
Human-in-the-loop approval — instead of auto-publishing, route the generated draft to a Slack or Telegram approval step where you tap "approve" before the dev.to publish node fires. This is the safest middle ground between full manual writing and full automation.
Final Thoughts
The real value of this pipeline isn't that it writes "good enough" articles — it's that it removes the activation energy problem. Most developers who want to blog consistently don't fail because they can't write; they fail because starting from zero, every single time, is exhausting. A system that hands you a solid first draft sourced from something genuinely trending removes that friction entirely. You still get to edit, refine, and add your own voice — but you're never starting from a blank page.
Build it once, test it carefully, keep published: false until you trust it, and let it run. That's the whole system.
If you build a version of this yourself, I'd genuinely like to hear what you changed — every pipeline like this ends up a little different once it meets someone's real workflow.
Related Articles

Top 20 Vibe Coding Tools & Websites in 2026
Vibe coding has exploded in 2026, with new tools promising to turn ideas into shipped products in minutes. This roundup ranks the 20 best vibe coding tools and websites — from Cursor and Claude Code to Lovable and Bolt.new — so you can pick the right one and start building.
Comments (0)
Be the first to comment.